Peach and Blueberry Galette
Posted: August 9, 2010 Filed under: Flaky Desserts Leave a commentTwo of my absolute favorite fruits are peaches and blueberries. I had three over-ripe peaches the other day and wanted to do some baking. Ironically enough, tastespotting led me to the most lovely concept I have learned about recently- galettes. A delicious cross between a crisp and a pie, I’m addicted. I used the recipe almost exactly as written here, with a few slight modifications which I will include below. I really REALLY enjoyed the delicate flavor of this pastry and the sweet buttery topping. My pastry making skills need significant amounts of practice, but this was only the second time I’ve tried to make a homemade crust so it’s alright.
Ingredients:
1 unbaked (9-inch) pie crust
3 ripe yellow peaches, peeled and sliced
1 cup blueberries
a little less than ¼ cup granulated sugar
3 tablespoons lemon juice
2 teaspoons vanilla extract
1/3 cup light brown sugar
½ cup flour
½ teaspoon cinnamon
¼ cup (½ stick) butter, softened
Directions:
Toss together peaches, blueberries, lemon, vanilla, and granulated sugar. Set aside.
Place all remaining ingredients except pie crust in mixer bowl. Attach bowl and flat beater to mixer. Turn to Speed 2 and mix until crumbly. Set aside.
Roll out pastry into a 13-inch circle and paint with egg wash. Transfer to baking sheet (it’s ok if pastry hangs over edge of baking sheet).
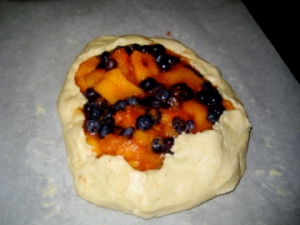
Gently mound peaches and blueberries in the center of pastry, leaving a 2-inch border of dough on all sides. Be careful not to overfill the pastry with fruit like I did! Eat the extra fruit if necessary. Fold pastry up over filling, pleated as necessary to fit snugly around fruit. Gently press dough to filling, reinforcing shape. Lightly brush the entire surface of the pastry with egg wash. Sprinkle with as much or as little of the cinnamon sugar mixture– I used all of it!
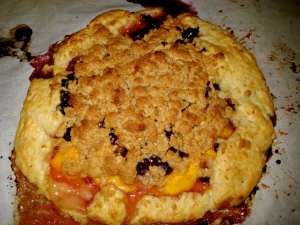
Bake at 400 degrees until pastry is golden brown and fruit has begun to solidify, about 40-45 minutes. Cool galette on baking sheet on wire rack for 10 minutes (I definitely didn’t wait that long, ha). Serve warm.
Pie Crust Recipe
Ingredients:
1¼ cups all-purpose flour
8 ounces cold unsalted butter
1/3 cup water
2 teaspoons apple cider vinegar
½ teaspoon fine sea salt
Directions:
Place flour in bowl. Cut the butter into pieces and add to the flour. Put the bowl into the refrigerator for 10 minutes so the butter can firm up again.
In a small bowl, combine the water, vinegar and salt. Place that in the refrigerator, as well.
Mix the butter and flour mixture using a pastry blender until the butter particles are the size of small peas.
Add the cold water/vinegar/salt mixture 1 tablespoon at a time and gently blend until ingredients are moistened and dough begins to hold together. Pat dough into a smooth ball and flatten slighting. Wrap in plastic wrap. Chill in refrigerator at least 15 minutes and for no longer than 24 hours.
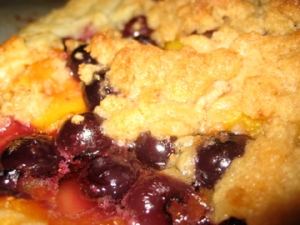
Pre-baking and Pre-crumb topping. Not the most beautiful, but definitely the most delicious.
Apple Pancake Contest
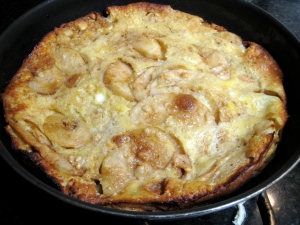
Posted: August 9, 2010 Filed under: Breakfast- Sweet Leave a commentDuring a recent weekend in Chicago, my mom and I developed cravings for a diner-like breakfast. Some scouting around the internet had me drooling for the apple pancake at Sally’s Waffle Shop in the Jefferson Park neighborhood. Even the 45 minute wait for the amazing piece of heaven wasn’t enough to quell my love for this! We feasted on its crisp and sweet exterior and cake like inside. Back at home, we embarked on a competition to re-create it. My mother insisted it was a Swedish Apple Pie… I won the competition with this delicious pancake, but it wasn’t close to the heaven we had at Sally’s. Perhaps fewer eggs would have helped. (http://www.urbanspoon.com/r/2/16195/restaurant/Jefferson-Park-Norwood-Park/Sallys-Waffle-and-Pancake-Shop-Chicago)
Filling:
3 or 4 tart green apples, peeled, cored, and thinly sliced
1 cup granulated sugar
2 T ground cinnamon
1/4 t nutmeg
1/4 cup butter
Batter:
5 large eggs
3/4 cup all-purpose flour
3 T granulated sugar
1/2 t baking powder
1/4 t salt
1 cup milk
2 T melted butter
1 t vanilla extract
~2-3 T brown sugar
1. Preheat oven to 425°F and combine apples, sugar, cinnamon, and nutmeg in a saucepan and cook for about 15 minutes or until apples are tender and fragrant.
2. While the apples bake, melt 1/4 cup butter in the oven in a large frying pan. Remove pan from oven and carefully swirl melted butter to coat all sides. Pour in the apple mixture.
3. Beat the eggs, flour, sugar, baking powder, salt, milk, 2 tablespoons melted butter, and vanilla until well mixed.
4. Pour egg mixture over the apples, sprinkle liberally with brown sugar, and bake for 15 minutes at 425°F; reduce heat to 350°F and cook an additional 10 to 15 minutes or until golden brown on top.
Serve immediately! With ice cream, if you’d like 🙂
Makes 4 to 6 servings.
Chipotle Shrimp Tacos
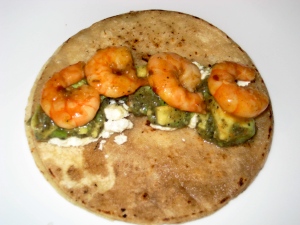
Posted: August 9, 2010 Filed under: Mexican 2 CommentsInspired by the amazing chipotle shrimp taco I had at Frontera Fresco, a Rick Bayless restaurant at Old Orchard Mall in Skokie, Illinois, I was determined to re-create my experience in limitless quantities at home. This recipe is incredibly simple after you have purchased your chipotle seasoning of choice. Also one of my new favorite foods.
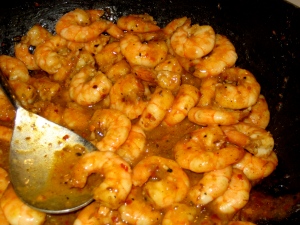
The quantities of all ingredients used in this recipe are dependent on how much you’d like to make. I marinated baby shrimp with:
Cumin
Chipotle Seasoning Mix
Salt
Pepper
Chili Powder
The shrimp was cooked on the stove until just tender and I added lemon juice to taste. I made an avocado salsa mixture by mixing chopped avocadoes with salt, pepper, and green tomatillo salsa, and used feta cheese and corn tortillas. After warming the tortillas up on the stove with some butter, I immediately sprinkled the cheese, avocado mixture, and warm shrimp on top. If you’re like me, you’ll add additional lemon juice on top of your entire concoction. These would be delicious with rice and beans on the side.

